Van Shore Power Setup: Safe 15A, 30A, 50A Installation Guidance
- Sep 18, 2025
This guide explores your options when adding shore power to your van's electrical system.
Table of Contents
Van Shore Power Setup: Safe 15A, 30A, 50A Installation Guidance
Van shore power refers to the ability to hook up your van or RV to grid power. Functionally, this looks like installing a specialized outlet receptacle on the outside of your vehicle that an extension cord, plugged into the grid, can then plug into. This specialized receptacle can then be wired into your van or RV's electrical system in any number of ways, the most common of which we will discuss below.
By the end of this guide, you’ll understand your shore power installation options, how to install a shore power plug, and you'll understand options for how to tie in your shore power with the rest of your electrical system.
Types of Shore Power Outlet Receptacles
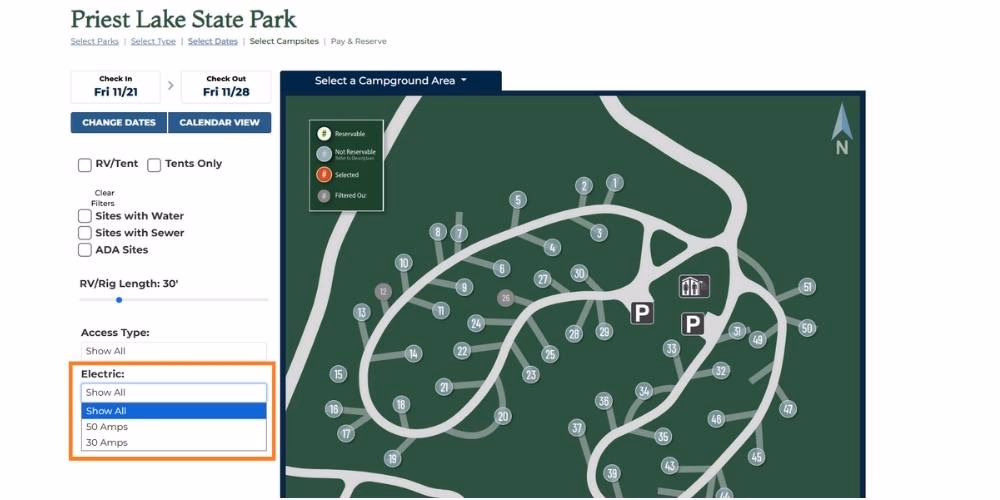
If you look at campground websites, they'll mention that campsites offering electric hook-up have specific amp services. In the image below, we see that campers are allowed to filter for specific amp services when selecting campsites:
There are three primary shore power plug types to consider when choosing your shore power plug, each is rated for a specific amp service. We will discuss each option below.
15 Amp Shore Power Inlet
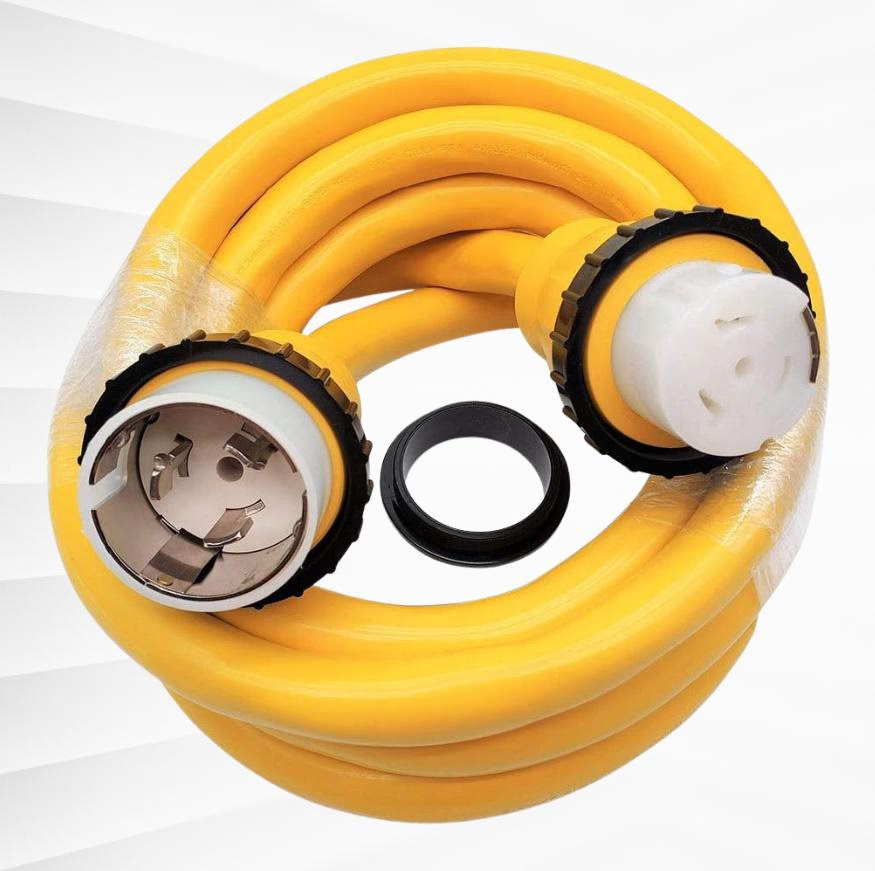
15 amp service is equivalent to what you get in your home. A 15 amp shore power outlet receptacle, or port plug, is essentially a short extension cord with a water-tight flange that is screwed into the van's exterior.
If you look at the image below, it's the female end of this extension cord that will be on the inside of the vehicle. The receptacle with the male end of the plug is mounted on the outside of the vehicle. An extension cord plugged into a standard exterior home outlet can be plugged into the male end, energizing the female end.
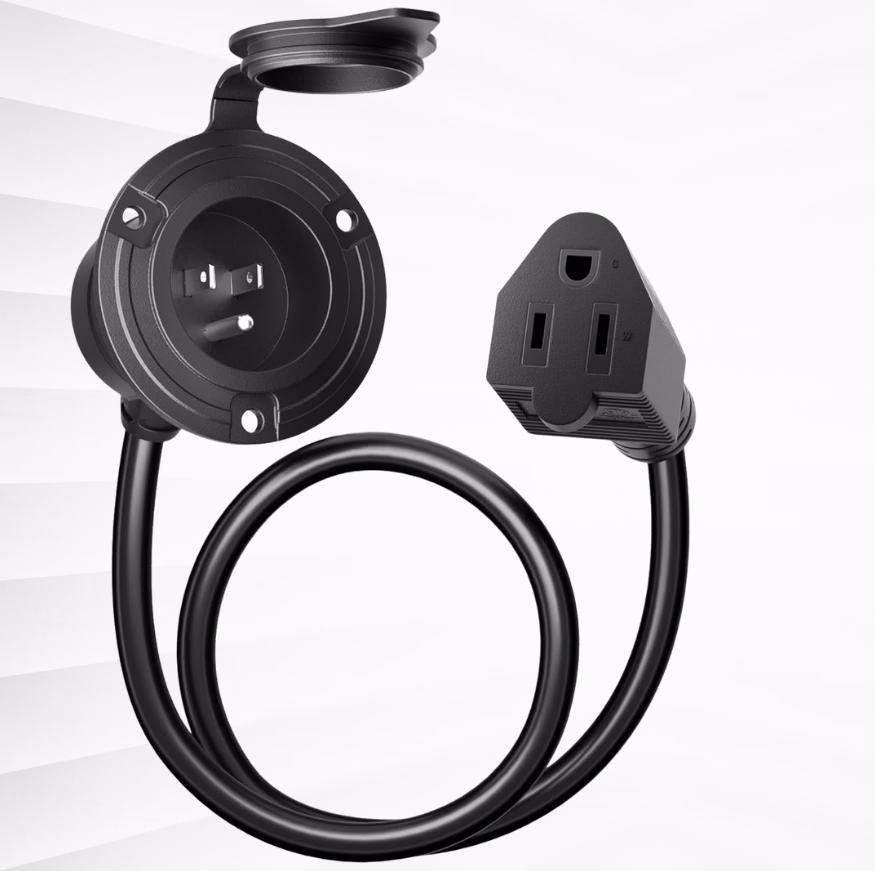
The 15 amp shore power hook up is the most versatile. Most campground shore power posts have a 15 amp outlets available. So does your best friend's driveway. Not only this, but 15 amp shore power can also be energized from a generator or Goal Zero-style power bank.
Bottom line: If you want maximum flexibility, the 15 amp shore power installation is for you.
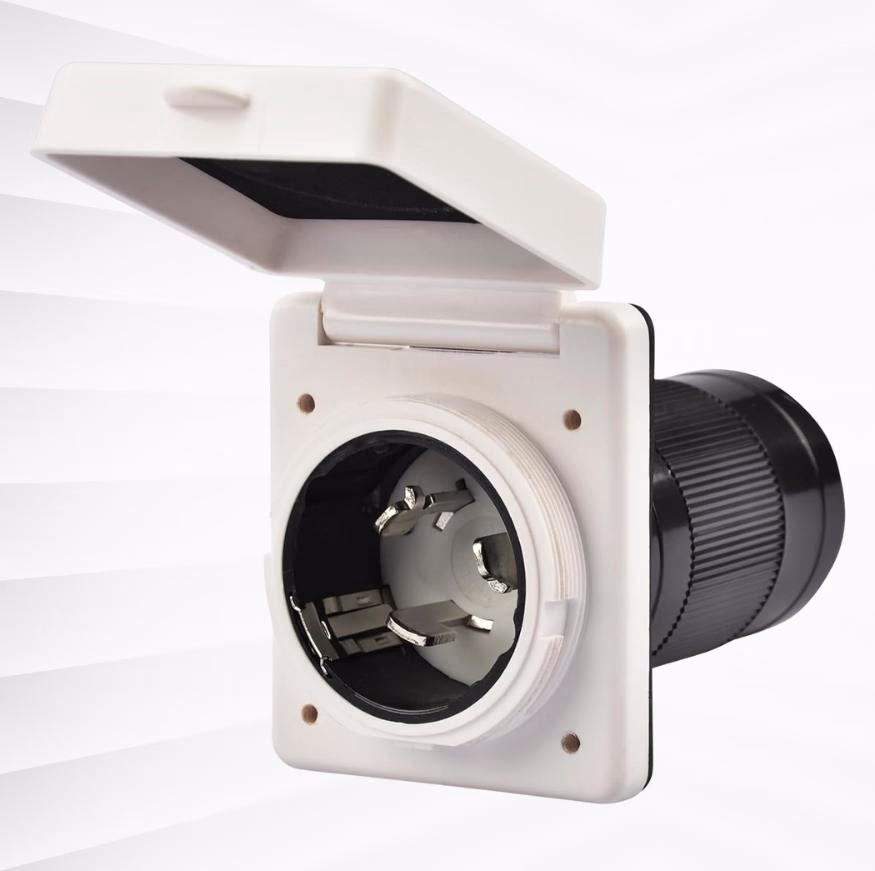
30 Amp Shore Power Inlet
Connecting to 30 Amp service at the campground requires a unique and dedicated cord and a shore power connection rated for 30 Amps.
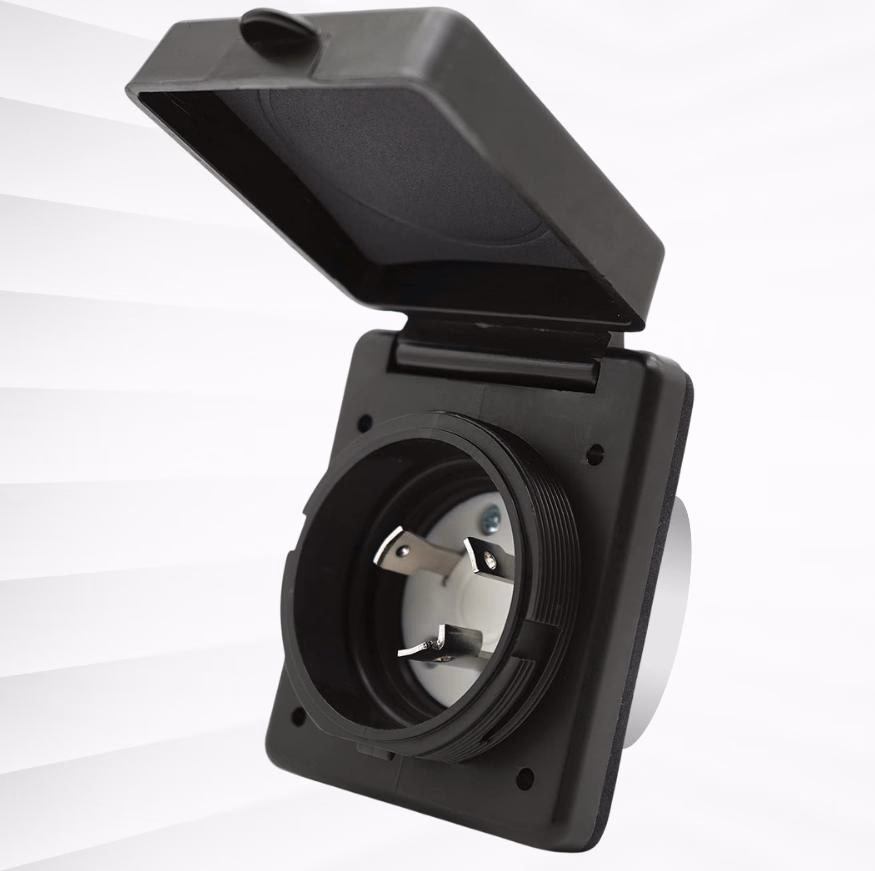
Similar to the 15 Amp shore power connection, the male plug and waterproof shore power port is screwed to the outside of the van. The back is exposed to the van's interior as it protrudes through a pre-cut hole in the side of the van.

These can be hard-wired into the van's inverter, assuming it has a built in transfer switch, or into an inverter charger or battery charger.
The 30 Amp shore power port connection must be used with a dedicated 30 Amp extension cord in order to power your van via the grid safely.
A 30 Amp shore power port is nice because it can supply more power than the 15 Amp service. But you're only likely to find it at paid camp sites, making it less versatile than the 15 Amp port. But if you plan to camp at traditional campground sites with electric hook ups, then the 30 Amp port is an excellent option.
50 Amp Shore Power Inlet
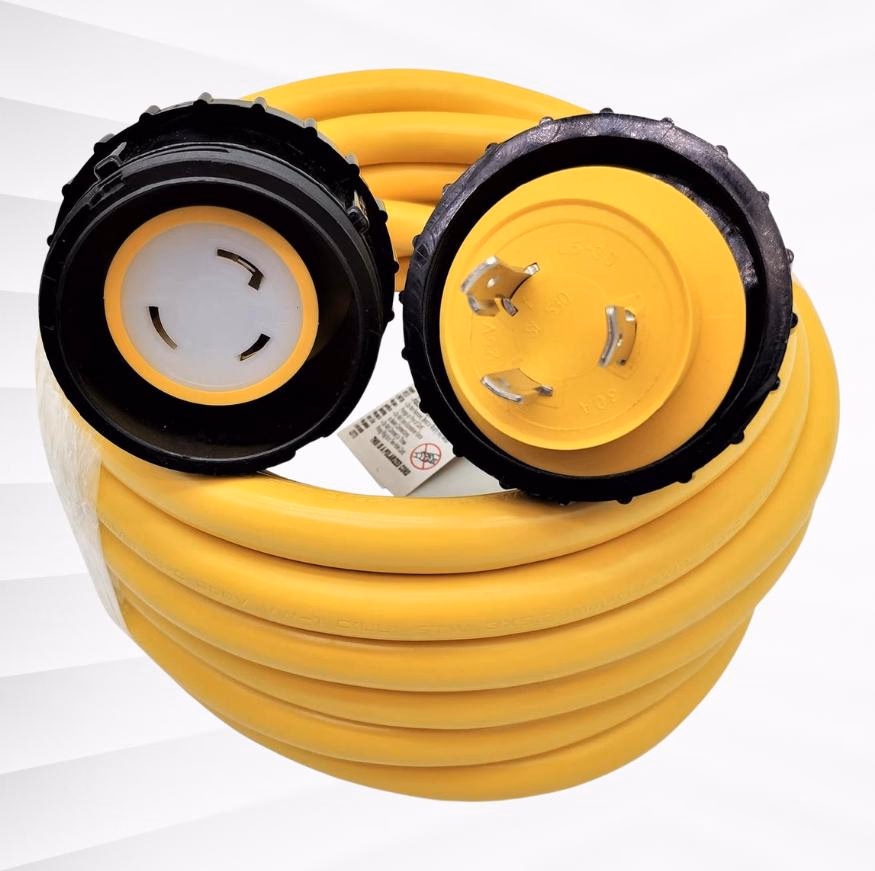
Connecting to a 50 Amp service at the campground requires a unique and dedicated cord and a shore power connection rated for 50 Amps.
The 50 Amp shore power connection must be used with a dedicated 50 Amp extension cord in order to power your van via the grid safely.
A 50 Amp shore power port is nice because it can supply more power than the 15 Amp or 30 Amp service. But you're only likely to find it at paid camp sites, making it less versatile than the 15 Amp port. If you plan to camp at traditional campgrounds, then the 50 Amp outlet is a good choice for you.
How to Install a Shore Power Port Plug
While cutting a hole into your van feels daunting, installing a shore power port plug is painless so long as you have the right tools on hand for the job. Here's what you'll need:
- Hole saw
- Drill
- Drill bits
- Round metal file
- Automotive primer paint
But before you make a cut, you need to identify where you want port installed. You'll most likely want the shore power port plug to enter into the backside of your eventual electrical cabinet. In most DIY van installation, this is traditionally near the wheel well. Before you drill into the van, ensure you have a clear path that will not cut into the van's structural ribbing or horizontal supports.
For a clean cut, cut the hole from the outside. The hole saw will drill through the metal quickly.

Once the hole is cut, use the round metal file to clean up and smooth the edges of the opening. Dab or spray vehicle primer on the exposed metal to prevent rusting. Once the primer is dry, the shore power port can be fit into the hole. The flange can be screwed directly into the van's metal paneling using self tapping 3/4-inch screws.
How to Connect Your Electrical System to Grid Power
Now that the shore power port is installed, you have the ability to power the interior of the van by plugging into an exterior power source. There are several options on how to tie into the electrical system.
Your gauge wire from the shore power port to your hook up point will be close to the values below:
- 15 Amp - 12 AWG
- 30 Amp - 8 AWG
- 50 Amp - 6 AWG
For safety, we strongly recommend consulting with the specific wire manufacturer's wire sizing chart, as differences in quality and ratings like insulator temperature rating can impact these sizing recommendations.
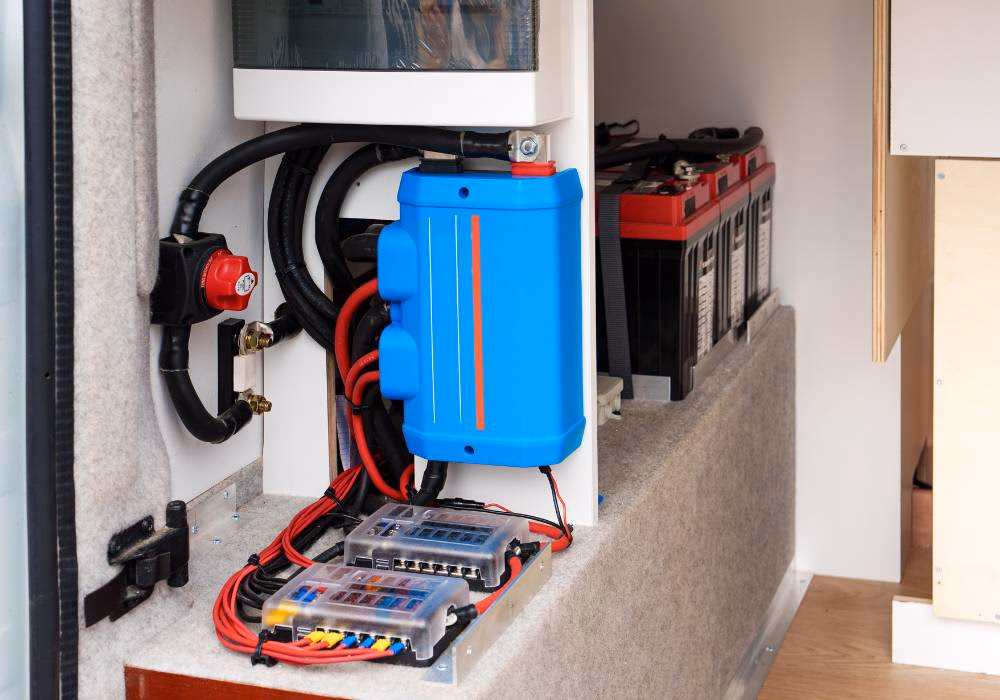
Wire Up a Battery Charger and Carry On As Usual
A simple approach to taking advantage of this shore or generator power is to use the shore power connection point to power a battery charger. The battery charger can be hard-wired via an M10 or M6 connector directly to the bus bar. This will charge the auxiliary batteries when plugged into the grid and the inverter will continue to run off the battery bank as usual.
In my van, I have a Noco Genius 5 Amp charger like the model pictured below:
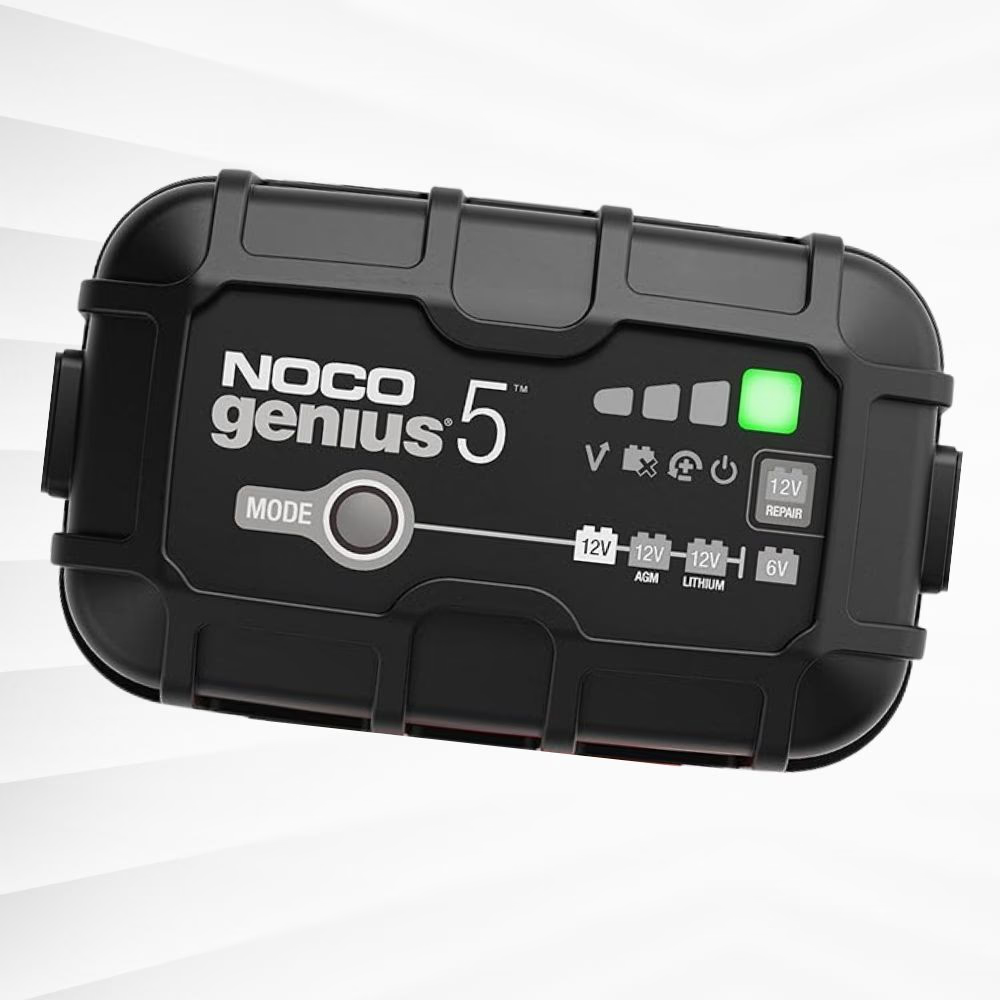
Charging my 400 amp-hour battery bank over a sixteen-hour period at a campground provides 80 Amp-hours of charge to my auxiliary battery bank. In addition to my solar, this has always been more than adequate—and, honestly, not even necessary. But it offers a peace of mind. Most campgrounds have 30-amp or 50-amp services, in addition to a standard 15-amp household outlet alongside the RV-specific connectors. So if you'd prefer a higher charging rate than 5 Amp, it's entirely possible. Noco Genius battery chargers range from 1 Amp to 50 Amp and have a Lithium charge mode on all chargers. This is what I use and I can confidently recommend it.
Bypass Your Inverter By Installing a Transfer Switch
An inverter transfer switch is a device that automatically switches the source of AC power feeding your circuits.
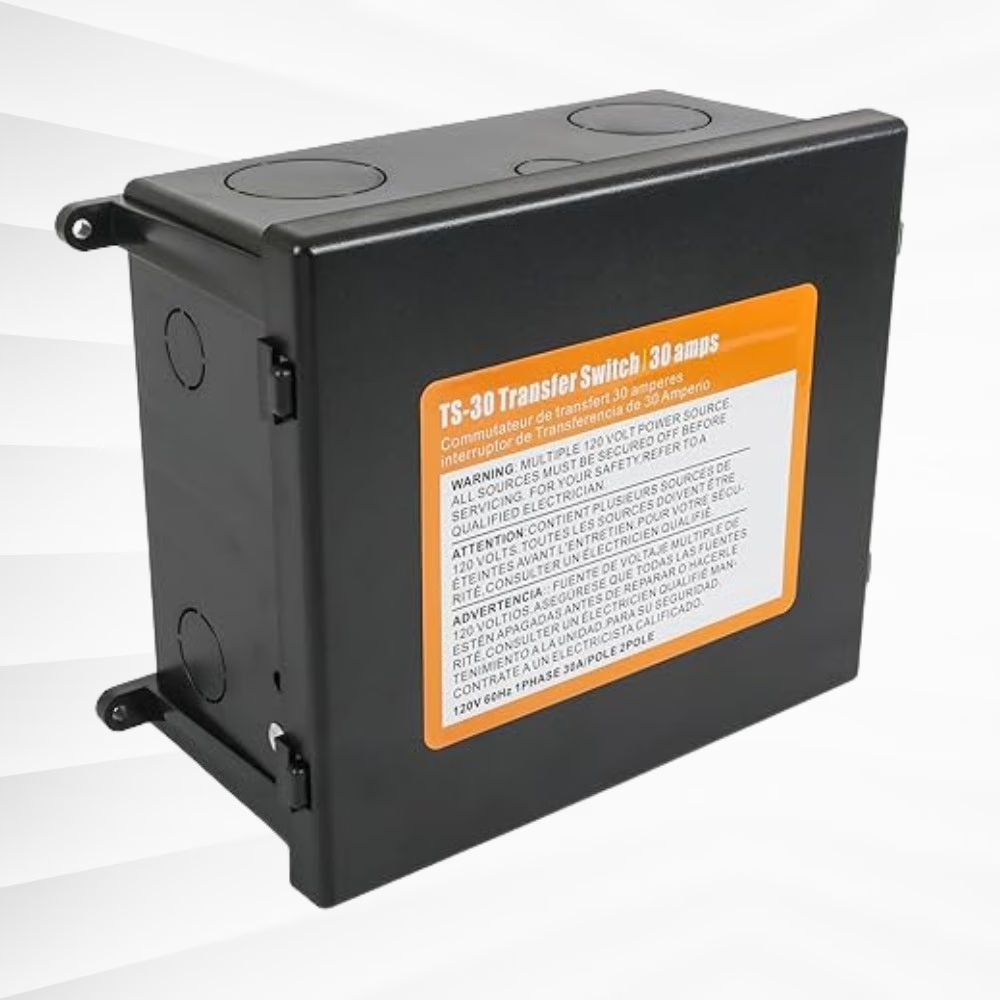
The switch will detect when the van is plugged into shore power and begin powering your AC circuits directly from shore power, completely bypassing the installed inverter. It does this by being installed between the inverter and the AC distribution panel. The shore power is hard-wired into the transfer switch.
Fortunately, many modern inverters have a transfer switch included internally. Follow the manufacturer installation instructions to hook up shore power to the inverter, as the recommendations will vary by manufacturer.
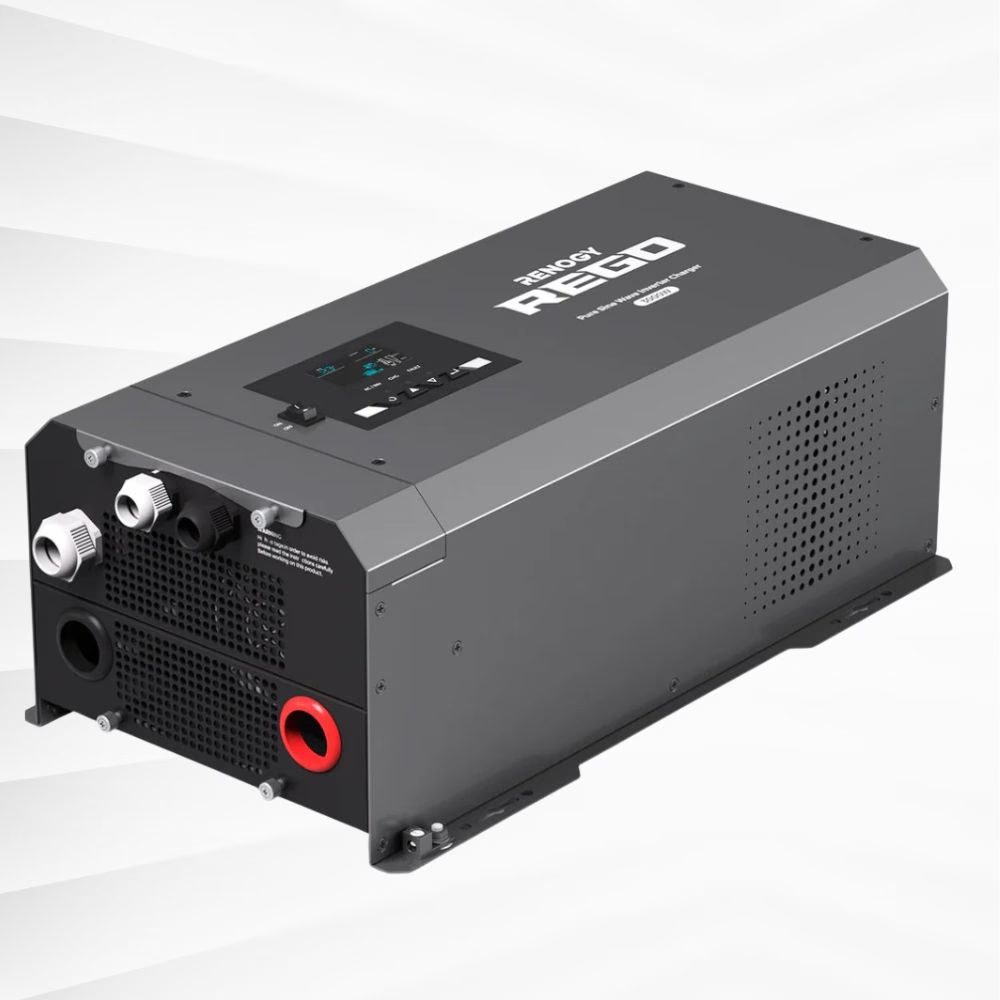
Bypass Your Inverter While Charging Your Auxiliary Battery Bank
Another option is an inverter charger. An inverter charger is a dual-purpose device that combines two essential functions for power systems: (1) Converts DC power into AC power (2) Charges the battery bank when shore power is available. When shore power is available, the device charges your batteries and can simultaneously power your AC loads
Moving Forward From Here
There's more to a van's electrical installation than just the getting your shore power installed. And we're building out our knowledge base to cover every aspect of this process, from design to long term maintenance. Please review our current articles related to van electrical installation:
If you're just getting started on your van build journey, please see our article: How to Get Started Designing Your Camper Van's Electrical System
For information on sizing your wires, please see our article Sizing Wire For Your Van Build: A Beginner's Guide
And for more information regarding solar installation, please review our article, Camper Van Solar Installation Guide For Complete Beginners
For more information about camper van inverter selection, please review our article: How to Select and Install an Inverter for Your Van