Why You'll Need A Bus Bar In Your Van's Electrical System
- Nov 22, 2025
By the end of this article, you’ll understand the purpose of a bus bar, bus bar options available on the market, and how to ground a bus bar during install.
Table of Contents
Why You'll Need A Bus Bar In Your Van's Electrical System
Every electrical component in your van’s electrical system must be connected to your auxiliary battery bank somehow. This is how generated power (i.e. power from your solar panels or alternator) re-charges your auxiliary battery bank. And this direct connection is how your auxiliary battery bank sends power to distribution blocks and appliances.
By the time your electrical system is fully installed, there's going to be four or more connections to your auxiliary battery bank. The problem is that your battery only has a single connection point at the positive and negative terminal post. This is where a bus bar comes in handy: A busbar serves as an extension of your battery post so that multiple components can more easily be connected to your battery bank.
By the end of this article, you’ll understand the purpose of the bus bar, bus bar options available to DIY van builders, the advantages and disadvantages of each option, and how to ground a negative bus bar.
What is a Bus Bar?
In the context of DIY van building, a busbar serves as an extension of a battery post so that multiple components can more easily be connected to your battery bank. Bus bars have many types. They come in different lengths, materials, thicknesses, and with differing fusing considerations.
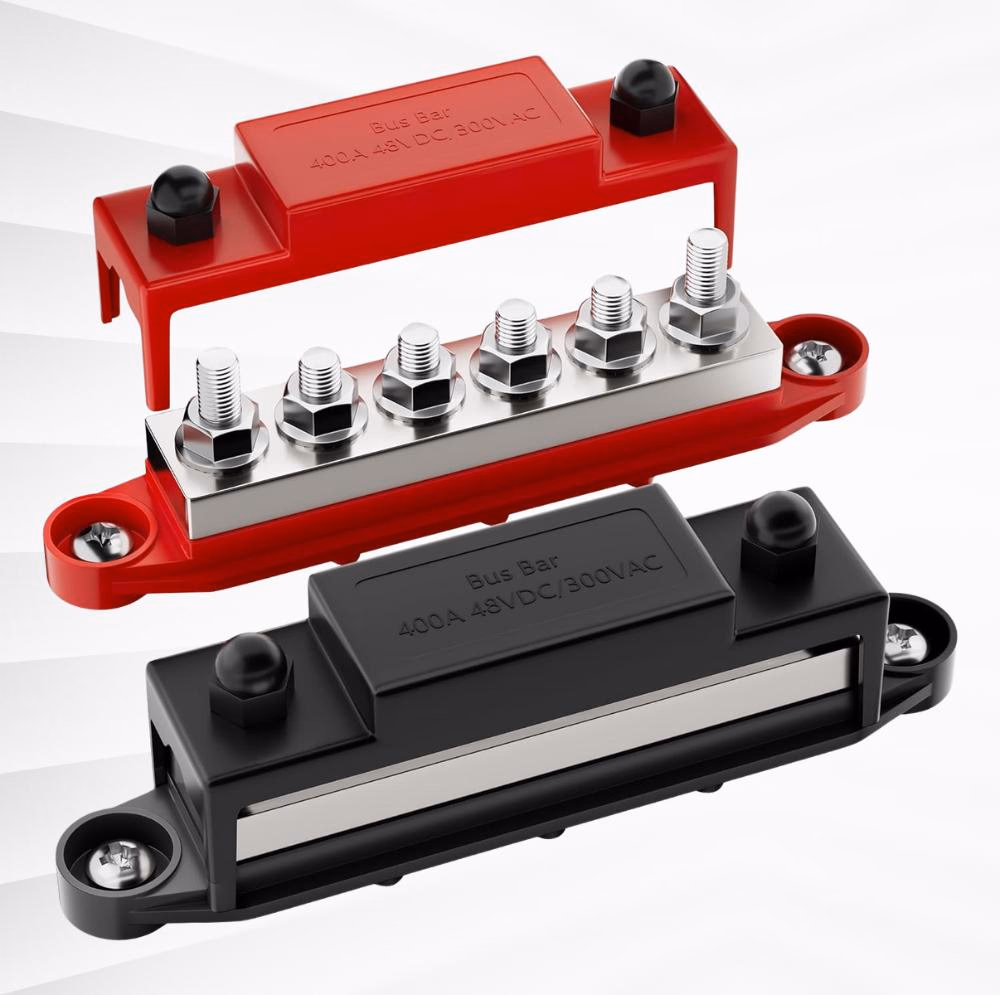
At its simplest, a bus bar is a thick metal bar with multiple bolts mounted to it. These bolts can come in differing sizes, such as M6 or M8. Some bus bars come with plastic covers. Some come with gaps between bolts that can then be bridged with fuses.
At its simplest, a bus bar is a thick metal bar with multiple bolts mounted to it. These bolts can come in differing sizes, such as M6 or M8. Some bus bars come with plastic covers. Some come with gaps between bolts that can then be bridged with fuses.
There will always be a wire from the battery post that then gets mounted to the busbar. The wire must be sized with a large enough gauge to safely handle the theoretical maximum current draw from all your electrical components attached to the bus bar. All other electrical connections are then connected to the battery via the busbar, where wires are mounted to the bus bar bolts.
Bus bars are rated for the amount of amperage they can safely handle. When designing your electrical system, you can calculate this value by adding up the theoretical maximum current draw from all your electrical components. It's encouraged to then multiply this value by 1.25 before making your selection.
Types of Bus Bars
Simple Bus Bar
The no-frills busbar type a thick metal bar with multiple bolts mounted to it. Consider the image below:
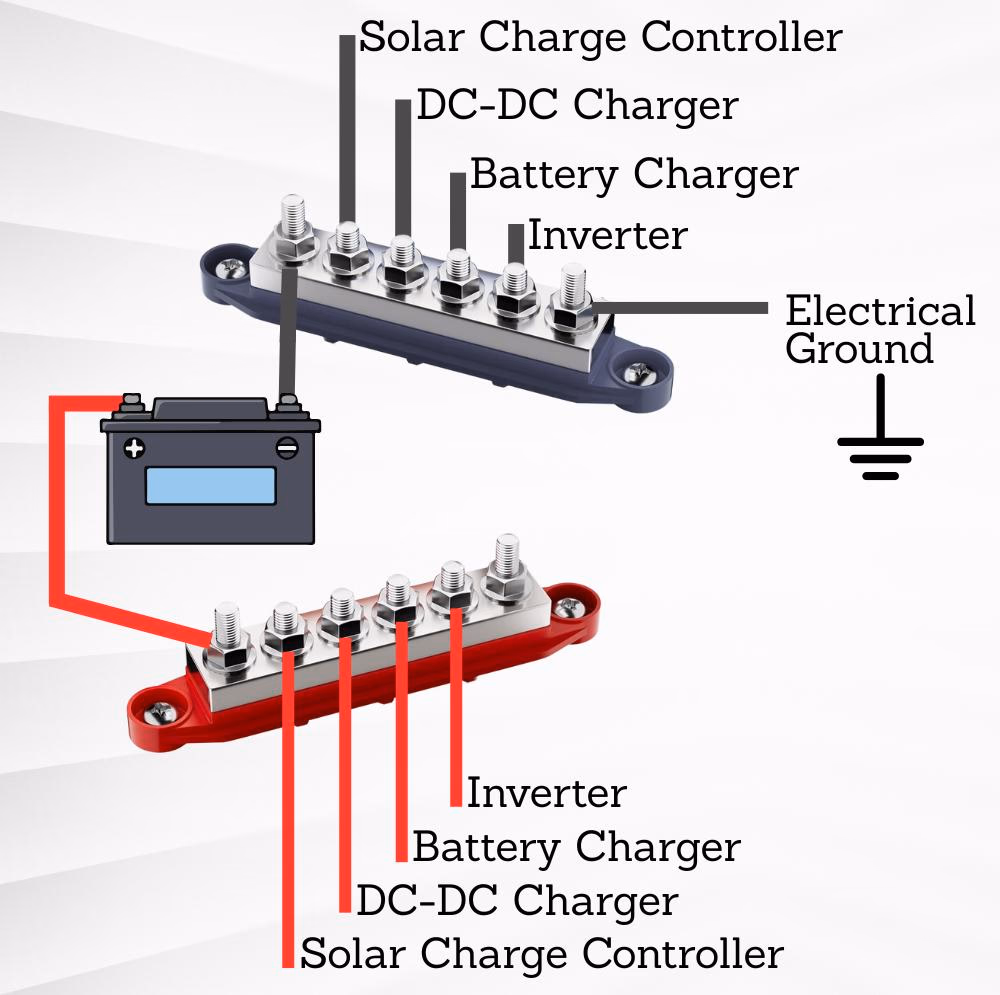
A wire from the auxiliary battery bank is connected to one of the bolts, as are wires from your solar charge controller, inverter, DC-DC charger, 12V Fuse Block, and any other component you might install. Once installed, it would look something like this:
Each of the wires from the various electrical components would also be fused along the positive red wire. The simple bus bars do not help with this, so stand alone fusing options have to be installed on these wires somewhere between their source and the bus bar. These fusing options are many, but some of the common choices in the DIY camper van space are pictured below.
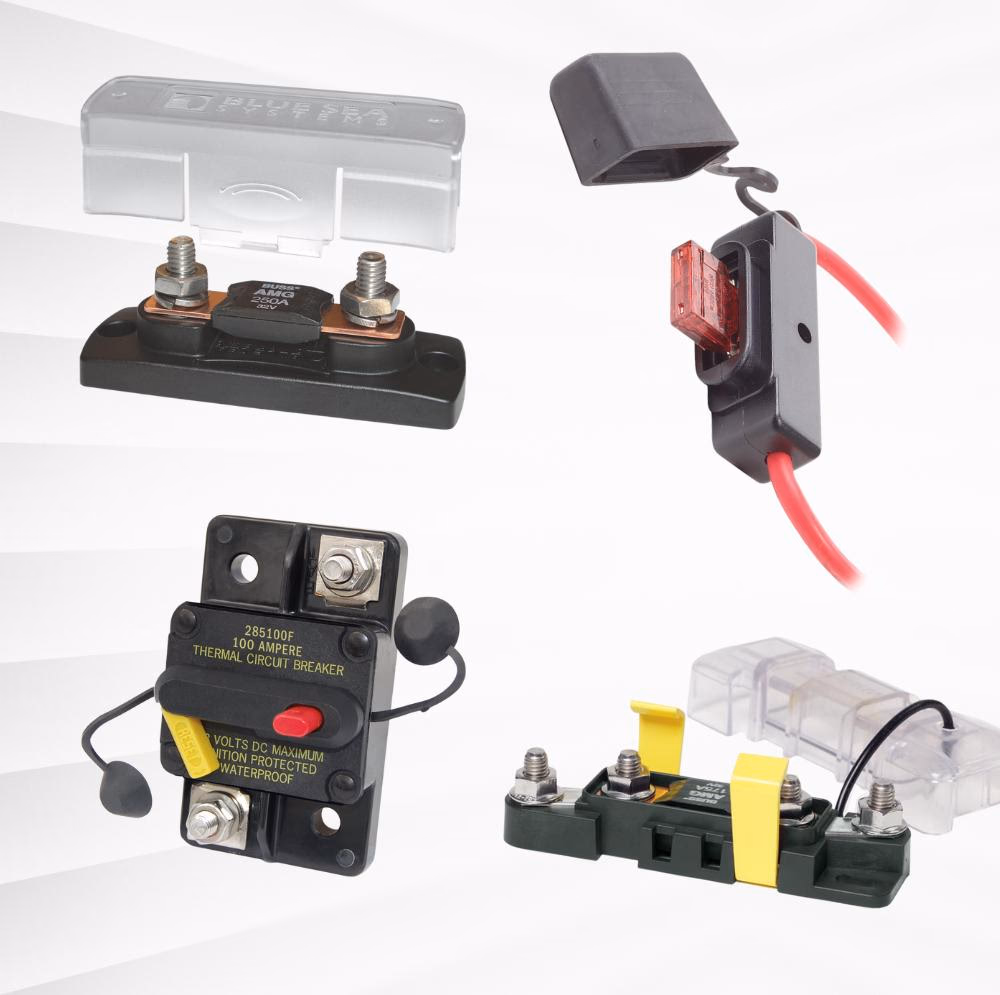
Each of these fuses range in price from $30 to $60. So while you might spend less on the simple bus bar option itself, the additional cost of adding individual fuses can make the seemingly more expensive bus bar option below more attractive.
Most van models commonly used for van conversions will have a 12 volt starter battery. So the most likely voltage input model you'll need is the 12 volt input model. Your auxiliary battery bank will likely be either 12 volt or 24 volt, so the charger's output voltage rating will need to match this value.
Bus Bar with Integrated Fusing
This depends on your auxiliary battery bank. Ensure your battery can handle the current by verifying that your battery's "Maximum continuous charge current" spec is greater than the DC-DC charger's charging current. Not only that, but you must also factor in the maximum solar charge current, as the solar panels will still be charging while driving down the road. With modern LiFePO4 lithium batteries, this is likely not going to be a limiting factor. But it's always best to verify and understand the ins-and-outs of your electrical system.
How to Ground a Bus Bar
Think of grounding as an intentional "emergency exit" for electricity when something goes wrong. If an energized wire were to break loose and touch a metal component (like your van's body), grounding provides a low-resistance path for electricity to flow back to the source. This causes a fuse or breaker to trip, cutting power before someone touches that energized metal surface and gets shocked.
Without grounding, that metal surface would remain energized at full voltage, waiting to shock anyone who touches it. To ground your system, connect the negative bus bar to the vehicle chassis using a wire with a gauge diameter at least as large as that used to connect the battery to the bus bar. This connection should be:
- As short as possible
- Connected to a clean, bare metal point on the chassis (sand away paint, rust, and primer)
- Secured with a bolt and lock washer to ensure solid contact
- Protected from moisture and corrosion (use dielectric grease)
When it comes to grounding your electrical components, follow the manufacturer recommendations. For example, just because your inverter is wired to a grounded bus bar does not mean the inverter housing is properly grounded. The manufacturer's manual will advise on separate grounding instructions to protect the inverter.
More Electrical Installation Articles
For more articles on your van's electrical installation you can find more Electrical articles here.